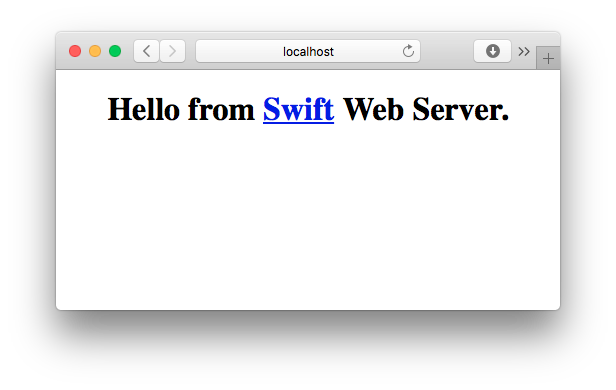
Now that Swift is open source you can use it for building command line tools and server side applications. One popular server side application is a HTTP server that serves HTML pages when making a request from the browser. In this blog post, you will learn how to write a very simple HTTP server in pure Swift so you have a better understanding as to how HTTP server really work under the hood.
In this example I am using Swift 4 on macOS. To get started we will
- First create an empty file and call it
simple-server.swift - Next add the following code to the file
This file contains hidden or bidirectional Unicode text that may be interpreted or compiled differently than what appears below. To review, open the file in an editor that reveals hidden Unicode characters. Learn more about bidirectional Unicode characters
import Darwin.C let zero = Int8(0) let transportLayerType = SOCK_STREAM // TCP let internetLayerProtocol = AF_INET // IPv4 let sock = socket(internetLayerProtocol, Int32(transportLayerType), 0) let portNumber = UInt16(4000) let socklen = UInt8(socklen_t(MemoryLayout<sockaddr_in>.size)) var serveraddr = sockaddr_in() serveraddr.sin_family = sa_family_t(AF_INET) serveraddr.sin_port = in_port_t((portNumber << 8) + (portNumber >> 8)) serveraddr.sin_addr = in_addr(s_addr: in_addr_t(0)) serveraddr.sin_zero = (zero, zero, zero, zero, zero, zero, zero, zero) withUnsafePointer(to: &serveraddr) { sockaddrInPtr in let sockaddrPtr = UnsafeRawPointer(sockaddrInPtr).assumingMemoryBound(to: sockaddr.self) bind(sock, sockaddrPtr, socklen_t(socklen)) } listen(sock, 5) print("Server listening on port \(portNumber)") repeat { let client = accept(sock, nil, nil) let html = "<!DOCTYPE html><html><body style='text-align:center;'><h1>Hello from <a href='https://swift.org'>Swift</a> Web Server.</h1></body></html>" let httpResponse: String = """ HTTP/1.1 200 OK server: simple-swift-server content-length: \(html.count) \(html) """ httpResponse.withCString { bytes in send(client, bytes, Int(strlen(bytes)), 0) close(client) } } while sock > -1 - Now run the code in the Terminal using the following command
swift simple-server.swift - Open the browser and go to
http://localhost:4000and you should see a web page served by our Swift server.

Awesome! Let us look at how this all works. We will walk line by line to understand what is happening.
First we import the C library in macOS as we will be using C sockets to establish a connection with the users browser. We will use this socket to read and send data back and forth. The C standard library is imported using import Darwin.C
The basic flow to create any network based application is to first bind your process to a port. Next the process will listen on that port for incoming requests. The process can now accept request from the user’s browser and the process now has to send data and then close the connection and accept the next request.
After import the C library we can use the following methods mentioned in the flow
- socket
- bind
- listen
- accept
- send
- close
We first create a TCP based socket using IPv4 using the following code
let zero = Int8(0)
let transportLayerType = SOCK_STREAM // TCP
let internetLayerProtocol = AF_INET // IPv4
let sock = socket(internetLayerProtocol, Int32(transportLayerType), 0)
Next we bind the process to use the socket (sock) we created and start using port 4000 for communicating with other network based applications such as a web browser
let portNumber = UInt16(4000)
let socklen = UInt8(socklen_t(MemoryLayout<sockaddr_in>.size))
var serveraddr = sockaddr_in()
serveraddr.sin_family = sa_family_t(AF_INET)
serveraddr.sin_port = in_port_t((portNumber << 8) + (portNumber >> 8))
serveraddr.sin_addr = in_addr(s_addr: in_addr_t(0))
serveraddr.sin_zero = (zero, zero, zero, zero, zero, zero, zero, zero)
withUnsafePointer(to: &serveraddr) { sockaddrInPtr in
  let sockaddrPtr = UnsafeRawPointer(sockaddrInPtr).assumingMemoryBound(to: sockaddr.self)
  bind(sock, sockaddrPtr, socklen_t(socklen))
}
Next we listen on the socket we created and specify how many requests to queue. In our case we allow for 5 requests to be queued up to be served.
listen(sock, 5)
Finally we loop forever and accept all incoming requests. The accept method is a synchronous and blocking method so code execution will not continue until a network application makes a request to our process on the port we specified.
print("Server listening on port \(portNumber)")
repeat {
  let client = accept(sock, nil, nil)
  ...
} while sock > -1
After we get the request we will construct a HTML string and reply back using send by passing the HTTP headers first followed by an empty line and followed by the HTML string we just constructed. We also close the connection after sending the data
  let html = "<!DOCTYPE html><html><body style='text-align:center;'><h1>Hello from <a href='https://swift.org'>Swift</a> Web Server.</h1></body></html>"
  let httpResponse: String = """
    HTTP/1.1 200 OK
    server: simple-swift-server
    content-length: \(html.count)

    \(html)
    """
  httpResponse.withCString { bytes in
    send(client, bytes, Int(strlen(bytes)), 0)
    close(client)
  }
Hope this gives you insight into how network based applications works under the hood and how HTTP servers are implemented at the low level.
If you enjoyed this and are interested in learning how to build a full stack server and with front end applications using Swift only, then you might find my book Hands-on Full-Stack Development with Swift a good read. Several topics are covered in the book from building native iOS and tvOS applications to building full stack server for these applications, only using Swift.
